Wonder Woman Cherokee (1997 XJ Sport) - An Origin Story

WNDR-XJ

Member 2024
Blue Ribbon Coalition
VA4WDA
Several of you have asked for an origin story of the Wonder Woman Cherokee, so, without further adieu, I give you Lucy (she got her name before her current paint job), the 1997 XJ.

She’s never driven better, and we’re very happy with her current set-up. We still have a few more things in store for her, as always. We started her build in 2018, once I no longer needed her as a daily driver. I had driven her completely stock for 11 years.

We learned many build lessons along the way. Alongside a bit of the process, those lessons are what I hope to share with everyone here. I thought it might be easiest to do this thematically, rather than chronologically, so expect a series of posts going through what we’ve done to the body, suspension, steering, drivetrain (including gears/lockers), wheels/tires, and a few interior mods.

Since the paint job is the most (in)famous, that’s first!

Why did we decide to repaint in the first place?
As with many of the older XJs, the clear coat was flaking in a number of locations, and some rust was growing in the rear quarter panels.

What did we end up using?
We didn’t want to spend a lot of money and we wanted to do the paint ourselves, so the choice to move to bed-liner was a very easy one. After researching a few options, we decided on Monsta-Liner, and we have been very happy with that choice.

Pros:
+ You can roll or spray it on, and they offer complete kits with all you need to do so.
+ The paint is very sticky, so less body prep work is required compared to regular paint. We used 80 grit on a random orbital sander across most of the surface as well as a heavy scuff pad. We only did a deeper sand on the areas where the paint had been flaking.
+ The paint went on in nice, thick coats and has proven to be very durable. It withstands the narrow, brushy sections at Rausch Creek very well!
+ Particularly with the roll-on application (which we did), the paint is not too textured/rough, so dirt is easy to wash off with normal car wash tools/pressure washer.

Cons:
- You can only order in quarts or gallons, you need to calculate beforehand fairly accurately or just end up with some leftover.
- Since it’s a two-part paint, it has a very strong odor. Respirators are definitely needed while working, and you (and your neighbors) will smell it for a couple of days around your house as it cures.
- It appears to have begun to fade a bit, particularly on the roof. We don’t have space for her in the garage, so she’s outside in the sun all the time.

What about the hood?
Obviously, we did something special on the hood and front panels. I wanted to go all-out on the Wonder Woman theme, and Kevin was game. I knew the breastplate design would be extraordinarily difficult to achieve with normal paint masking techniques, so I found a guy on eBay selling vinyl decals of the design I wanted. He was offering them in what I’ll call “normal” sizes. I asked him how big he could make one. He said 2 feet x 4 feet, and I said “Send me one!”

Before applying the decal, we laid down two coats of primer and two coats of gold paint, both from Eastwood. After those cured, we hung a laser level from the rafters in the garage and applied the massive decal to the hood. I extended the stripes down the front quarter panel with masking tape.

1643470921388.png


I then sprayed around the edges of the decal and tape stripes with a dark silver metallic paint (just a can that came from Advance Auto). As the silver was setting, I pulled up the decal and tape, and voila!

1643471067865.png


Once the silver cured, we applied a clear coat and allowed to cure again. We then masked the area where the decal had been and began applying the Monsta-liner.

1643471099132.png


As mentioned above, we rolled the Monsta-Liner - two full coats on both the red and blue sections. Those two coats had to be applied within a certain time of each other for best results per product directions. We did not bother to put Monsta-Liner in the door jambs, as we felt that would take much more effort. Because the vehicle was originally red, it still looks great since there’s no color difference to the interior. Start-to-finish, the entire painting project took about 1.5 weeks.

1643471130956.png


What lessons did we learn about the paint?

For the second coat of Monsta-liner on the hood, we did not get as much coverage around the breastplate design. This was because we had already pulled up the tape we had used to mask it after the first coat since we were worried it would harden too fast and we wouldn’t get a clean line. However, that meant that we couldn’t go right up to the line on the second coat, particularly because the Monsta-Liner is not very precise and goes on “gloopy.” We subsequently learned that specialized auto masking tape exists with wires embedded in the edge, which is commonly used in commercial bed liner applications. We might have invested in some of that to solve this problem.

We have been less happy with the clear coat on the hood. In our first trip out (about 4 months after applying the clear coat), we got some good Virginia clay/mud on it, which resulted in spots/etching on the surface. We took our truck into the very same mud (with its factory finish), and it did not result in the same issue. We are not sure exactly why this occurred. It could be that the clear itself was not the highest quality. Perhaps we needed to do more coats. Perhaps we should have heated it (we applied in October, approaching the lower range of the satisfactory temperature range for application) – given the heat put off by the 4.0L engine, perhaps we should have just turned it on for a while to help the curing! We now do occasionally polish the area, which makes the spotting less noticeable.
 
Nice write up. That sounded tedious. But time well spent. I love the design.

Are you going to say what was done mechanically?
 
With this post, I'll finish up what we've done to the body so that I can move on to the fun stuff. 😋

What bumpers are we running?
Selection is limited for the XJ compared to the Wrangler. We are running a matching set of Smittybilt XRC front/rear steel bumpers. They were reasonably priced and we have found that they offer excellent protection, while not being over-the-top. I like the stinger bar look (and it has served its purpose a couple times in Moab), but it is easily removable in the event that we need to drive straight up a wall.
1644113009130.png

Installation for both front and rear was not too bad. The front was particularly easy. The rear interfered with our factory gas tank skid, so it required some cutting and a few installation efforts to get it right. The rear bumper has an integrated tow-hitch, so we could remove our aftermarket hitch assembly.

The rear bumper came with rear quarter panel armor, which we definitely need. The rear quarter panels are the only place where we have significant rust, and the armor covers it quite nicely. We had to slightly modify them to fit with our high-clearance fender flares, but that was easily accomplished with an angle grinder.

Our rear bumper is the version with the tire carrier. This was a must since the XJ spare is otherwise stored standing up in the trunk, where anything larger than stock does not fit. The tire carrier portion was also marketed to fit a full-size jerry can…but it doesn’t fit the Wavian ones. We ended up doing some modifications with the welder to cut a notch into the cage so that we could stuff the can into the hole.
1644113026632.png


We also had to make a custom solution to relocate the license plate outboard to accommodate the tire carrier. We bent two flat aluminum bars to the contours of the body and mounted those to the original license plate holes. We ran the electrical for the lights behind those and put some rubber bumpers so they don’t bang into the hatch.
1644113044961.png

1644113056098.png


What sliders are we running?
The sliders are also Smittybilt, full steel. They are nice in that they are fairly low-profile, and they do indeed slide easily over rocks. We have taken a few hits there, and they have performed quite well. That said, the XJ has unibody construction, and these are essentially body-mounted. When I take a hit, the slider moves up towards the doors…less desirable. We are thinking of attempting to somehow tie the sliders in to the lower “frame” portion of the unibody, where we have added frame stiffeners. Doing so would prevent at least some of that behavior. That’s a future project.

What fender flares are we running?
We have the Bushwacker high-clearance flares. They required some cutting of the body, but we recall the instructions being good. They worked very well for 33s, but we have moved up to 35s, and they don’t offer quite as much clearance as we would like. I don’t want to go higher on the lift, so we may end up making our own fender flares eventually and opening up the body a little bit more. That’s also a future project.

What lessons have we learned with this armor?
Overall, we’ve been very happy with our bumper choices. That said, they are HEAVY. Fortunately, the XJ itself is much lighter than its JK/JL cousins, even with steel bumpers. The light weight is part of what makes the XJs so capable, even when running smaller equipment. We’ve come to appreciate how much of an advantage that is, so if we were to do it again, we would definitely try to find an aluminum bumper option. (Or practice TIG welding by making some.) On our Galactica build, our bumpers are frame-integrated, but, if they weren’t, we would be going full aluminum. Otherwise, we’re doing as many lightweight parts as possible on both Jeeps.

The tire carrier has developed a couple of issues. The latching mechanism can be finicky and can be quite difficult to unlatch periodically unless you press on the tire/carrier just right. While it worked well for our non-beadlock 33s (just under 100lbs), the weight of our beadlocked 35s (about 140lbs) seems to be a bit much for it, causing more frequent latch issues and rubbing.

As mentioned above, the sliders have the inherent weakness of being mounted on the rocker panel, which is simply inferior to a frame/unibody-mounted option because it will bend. If we were to do it again, we would definitely opt for a unibody-mount style. Galactica’s sliders will be welded to the frame. We know there are some nice aluminum options out there for JK/JL sliders, but we are sticking to steel there.
 
I want to see this XJ on the trails. You mentioned Moab. Has it been to Rausch?
 
We've actually brought it to Camp Heep the past two years! In 2020, when we first pulled up, there was definitely a little skepticism from our group as to whether they'd have to drag it over everything. Once we got to the first obstacle and switched on our air lockers (post forthcoming), nobody was worried anymore ;)

She's done a few 6s in Moab (my profile picture is the waterfall obstacle on Steel Bender). We're confident she can do tougher ones out there, but we were on 33s at the time, so stuck to the 6s. She can also tackle blacks at Rausch, no problem. We'll sign up in your group next time, Dain!

If I am running a green group, don’t worry about running in my group. But I would love to slip away and run some blacks with you.
 
If I am running a green group, don’t worry about running in my group. But I would love to slip away and run some blacks with you.
We actually ran greens/blues with her last Camp Heep since Galactica could not do much else at the time. That will change very shortly!
 
This post will chronicle our first attempt at a comprehensive build.

We had always wanted to build the XJ, but it wasn’t feasible until a few years ago when she was no longer in service as a daily driver. We did this first build on a fairly tight budget. Our goal was to make her capable of doing “6” rated trails in Moab during Easter Jeep Safari in 2019. The event had been on our bucket list for a while. We stuck to the goal very well in terms of both cost and capability, but we found out shortly that you really do get what you pay for.

We did the entire build ourselves, which was not only a great way to save money, but a way to learn our rig in the process. That knowledge is incredibly helpful off-road – we understand better the limitations of the vehicle, and we know that we will be prepared to fix breakages because we know how it went together originally. While we both knew our way around auto repair, neither of us had done anything to this extent before. But we both enjoy taking things apart and figuring out how they work, so we were well-suited for the task. Also, BleepinJeep had videos for just about everything we needed to do (on a Cherokee no less)! I would really encourage anyone to try installing stuff themselves – if you don’t have experience or tools, plan a wrenching party or ask for help on the forum.

In hindsight (and with build ver 2.0 under our belts by now), we do wish that we had done a few things differently the first time. Of course, that’s not always possible with budgets. Or maybe you aren’t sure that Jeeping is fully your thing. Or you just don't know what you don't know! We were also lucky to be able to do this build simultaneously. We could pull her into the garage for four months of weekend tinkering, and this meant that we were very fortunate to have everything come together well given that what seems like a small change to one component can have cascading effects on the happiness of your Jeep.

What follows is a brief summary of the major components of build ver. 1.0.

1. Rear Axle
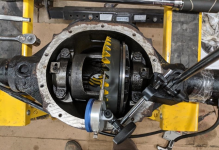
Wonder Woman unfortunately came from the factory with the Dana 35, which was the most common (and inferior) XJ rear axle. The better Chrysler 8.25 was optional (and Dana 44-equipped XJs were very rare). We located a used 8.25 from a national junkyard-style dealer for about $500. Aside from installing the new gears/lockers (see below), we upgraded to Ten Factory’s 29-spline chromoly axle shafts. Otherwise, we maintained the original drum brakes (which we did rebuild) and kept the leaf spring set up (but with the lift described below).
1644780078889.png


2. Front Axle
On the front, we maintained the factory Dana 30 axle. However, knowing that it is one of the weaker front axles and given our step up to the top of its recommended range of tire size (33s, at the time), we added a truss, as well as gussets to the inner Cs. We did the same axle shaft upgrades, gears, and lockers on the front as well.
1644780175286.png


3. G2 gears at 4.10
Inside the axles, we opted for G2 4.10 gears. Running 33s, this was essentially equivalent to the factory set-up (i.e., we did not gear down relative to tire size). We still wanted to be able to drive it on shorter trips (e.g., Rausch), and we were worried that going too low would have negatively affected our ability to do that. We were going for the happy medium of capability and drivability and achieved it for the 33s with 4.10s.

This was our first attempt at re-gearing, and it took us several tries and multiple re-reads of the factory service manual, the product instructions, and a few YouTube viewings, to get it right. After a couple of frustrating attempts, we figured out the concept of set-up bearings and bought another full set of bearings. We also invested in a Harbor Freight shop press, and it has become nearly the best $150 we have ever spent on a tool. Because the rear axle uses side adjusters to establish preload, we also ended up fabricating our own version of a factory service manual “special tool” (pictured below) to turn those adjusters. We made this out of a nut and some black iron pipe (as there was absolutely no reason to spend $150 on that tool).
1644780228864.png


We were a bit displeased with the G2 kits in that the pinions proved very easy to cross-thread. We had to contact customer service to get a second one for one of the axles because the first one was defective. Even the replacement one had threads that seemed quite brittle, even when using a multi-use pinion nut. We managed to save the second pinion with a tap and die set (another valuable tool purchase that has saved us on numerous Jeep projects). The G2 kits also came with relatively lower quality bearings. We ended up grinding them out to use as our set up bearings and purchased Timken bearings for final use. Spoiler alert: for build ver. 2.0, we went with a Yukon kit.
1644780521397.png


4. ARB lockers
We had initially ordered Aussie lockers, a lunchbox style option which is much better for the wallet. However, we did not realize when we initially purchased our new gears and lockers that the 4.10 was above the carrier break for the axles and that we needed new carriers in both front and rear as a result. The Aussie lockers were not compatible with what we needed, and knowing that we had to eat the expense for new carriers anyway, we decided to move up to ARBs. This was the best decision we made for build 1.0. Plus, we were able to sell the Aussie lockers for not too much loss.

We have been very happy with our ARBs. We have always paid very close attention to carefully handling the parts and haven’t had major issues. We did experience a bad seal within the housing on the front locker a couple of years down the road, but ARB’s customer service sent us new parts very quickly at no charge, and we haven’t had an issue since. Plus, when you flip the switch, they’re on – no waiting or rolling back and forth. And, if you are having an issue, at least you’ll know it because your compressor will be buzzing at you. Even with an intermittent leak, the lockers are usually solid enough to still get you through the obstacle.

We had a slight issue of our own making in that we initially installed the air line too close to the top of the diff on the front axle such that it would get hit by the hardware on our upper control mount in certain circumstances and knock the line loose. We first developed a new combination of installation hardware for the control arm mount to solve that issue (see below, using a rounded bolt). We eventually changed the mounting location for the air line by drilling a new hole in the pumpkin and plugging the old one.
1644780560234.png


We got the ARB diff covers for both axles to protect this investment, and we have been very happy with those as well. Very heavy duty, easily drainable and fillable, two large/strong magnets to capture metal shavings, and worth the cost.
 

Attachments

  • 1644780377980.png
    1644780377980.png
    770.3 KB · Views: 65
  • 1644780643064.png
    1644780643064.png
    1 MB · Views: 66
  • 1644780685819.png
    1644780685819.png
    1.4 MB · Views: 59
  • 1644780728514.png
    1644780728514.png
    728.4 KB · Views: 59
  • 1644780957365.png
    1644780957365.png
    1,001.7 KB · Views: 62
5. Air Compressor
To run the lockers, we installed ARB’s high-output single cylinder compressor. Looking back, we probably should have opted for the dual cylinder version to be able to more rapidly inflate our tires. That said, the small size of the single cylinder compressor allowed us to mount it under the flip-up rear seat. Since there was already a plugged hole in the body there, we could easily run the air lines to the axles from there. It also helps keep the compressor clean and out of the way. We also mounted an air hose fitting that just edges out from under the seat so that we can inflate tires without lifting the seat.
1644782049962.png


6. Lift (Rough Country 4.5”)
Our first lift kit was the Rough Country 4.5” long arm kit. This was sufficient to fit 33s with high-clearance fenders (see previous post). It was also a very economical option at around $1200. It was easy to install and came with all of the components needed.

At the time, we were pleased with it (especially the price), but observing its behaviors allowed us to gain a much better understanding of how suspension systems operate and the pros/cons of different types (and why it was so cheap).

The main issue we noticed was that it claimed to be a “long arm” kit…but it wasn’t exactly. It was more a radius arm kit in that it had 2 long, lower control arms, off of which two shorter upper control arms sprouted to mount to the top of the diff on the driver side and the stock upper control arm bracket on the passenger side. Look closely in the background of the picture below to see this. What we noticed with this set-up was some binding in the suspension such that the full range of articulation was unavailable. The axle also didn’t sit level when drooped – it would always go down more on one side. Finally, the axle would see some very strong oppositional pressures capable of bending the upper link mounting bracket on the passenger side. Not good. Spoiler alert: 3-link long arm kit up front for build ver. 2.0.

We also subsequently changed out the shocks from the RC ones to a set of Bilstein 5100s. The Bilsteins are essentially the same size as the RC ones but the ride is now significantly smoother, and I’ve seen others’ posts on their rigs make very similar comments. It really is amazing what a higher quality shock can contribute to ride quality. More on this in later build ver. 2.0 post because we also realized how uncomfortable leaf springs are at the same time. Spoiler alert: triangulated 4-link with rear coils for build ver. 2.0.
1644782037180.png


7. SYE kit
With the lift height, we need to install an SYE kit so we didn’t drop a drive shaft in the middle of an obstacle. The transfer case was very difficult to remove from the Jeep. If you want to know how difficult, watch the first 4 minutes of this BleepinJeep video, particularly starting at 3:35.

In our case, not only were the bolts difficult to access (we had to buy a set of flex-head wrenches to access them), but we also had to soak everything with PB Blaster for a while. Then, the photo below shows what happens when you take the t-case off the vehicle first and then don’t have a big enough pipe wrench to hold onto the yoke to break it loose...little bit of redneck engineering.
1644782022681.png


8. Steering
In build version 1.0, we switched to over-the-knuckle (OTK), one-ton steering (Y-link style) from JCR Offroad. We needed to upgrade the steering components anyway and moved to OTK to gain the ground clearance compared to sticking with an under-the-knuckle (UTK) one-ton kit. We did have to adjust our steering stops a bit so that the tie rod would clear the diff cover in the OTK placement, so we lost a little bit of turning radius, but it was not significant.

Having added a lift and significantly changed the overall steering mechanism, we also introduced some wobble. Lucy has never had death wobble, but our mods added a fair bit of play to the steering. In researching solutions, we came across The Cure! from Ruff Stuff. It didn’t eliminate the play entirely, but it made a huge difference – it’s worth the $25.

We kept the stock steering gearbox at this point, but it was very unhappy with us at all after a full, hard week in Moab! After our last trail for the week (fittingly, Hell’s Revenge), we limped her back onto the trailer for the ride home to VA with a profuse steering fluid leak. Our first repair was to upgrade to a new Red Head steering gear box and to install a steering box brace, which also happily took even more play out of the steering. More on steering to come in a later post.

9. “Frame” Stiffeners
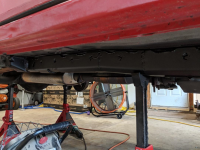
As mentioned in a previous post, the XJ has unibody construction, so there’s no “frame” per se. Upgraded suspension can stress the unibody and cause breakages. We therefore installed frame stiffeners from JCR Offroad (front section) (mid-section). Installing these was a great “learn to weld” project, as fully welding all the way around these on both sides was a couple dozen feet of practice.

The only issue we have experienced with the frame stiffeners is less an issue with them and more an issue with other products. Many suspension systems are not designed to work with the added width of frame stiffeners on the XJ, or companies make their own special frame stiffener that leaves certain strategic gaps where their own suspension components fit. This can make it difficult to mix and match. We thus had to make minor modifications to other brackets/components that we did not purchase from JCR so that they can be fitted over the frame stiffeners (e.g., drag link bracket, cross-bars). Not too big a problem.

1644782009871.png


Next up will be the process of getting to build version 2.0...
 
Last edited:

Build Ver. 2.0 – Major Recalibration of Steering and Brake Systems

This all started when we bent our front lower control arm brackets at Camp Heep. The factory steel was maybe 1/16 inch. The damage was not major, and they were still perfectly functional, but we saw the writing on the wall.

New LCA Brackets and Coil Spring Buckets
To replace the factory LCA brackets, we used Artec’s ¼ inch LCA brackets. We were so impressed with the quality that we got their replacement coil spring buckets too. It would be so efficient to just cut, grind, and weld everything at once, right? Wrong. This kicked off a months-long re-engineering of the entire steering system.
1645491163361.png

Our first error came when we misaligned one of the coil spring buckets by accidentally flipping our magnetic angle finder between the two buckets, which meant that we welded them on at opposing angles. We plasma cut the mistake off, got a new bucket, and the second time was charm, but reassembly had its own problems.

The significant added thickness of the new buckets, combined with our over-the-knuckle steering resulted in MAJOR clearance issues. The tie rod (which we had moved over the knuckle on build version 1.0) hit the buckets with just a slight turn of the steering wheel. Back to the drawing board…with pieces from XJs, WJs, TJs, and aftermarket parts.
1645491202791.png
1645491207128.png

Change from Y-link to Crossover Steering with WJ Knuckle Upgrade
We needed to push the tie rod out from the axle nearly an inch to get it to clear at full lock. We also wanted to keep a straight tie-rod, rather than move to a curved one due to the superior strength of the straight link. This forced us to get offset tie-rod-ends to enable that scale of outward movement. This, in turn, required tossing the Y-link steering which we had already upgraded in build 1.0.

We moved to the Stinky Fab Racing (SFR) kit with a 7075 aluminum tie rod, drag link, and track bar. We have been very pleased with these. The 7075 is (unlike steel) nearly impossible to bend with the pressures encountered on the trail. This video of SFR testing the product sold it for us. The aluminum links are slightly thicker than their steel counterparts which wasn’t ideal for our build, but our offset tie rod ends and other solutions were sufficient to make them work.

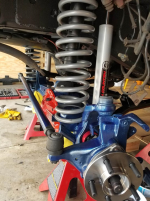
XJs did not come stock with crossover steering, but WJs did and WJ knuckles can bolt on to XJs with a few mods. Because the WJ knuckles are slightly larger than the XJ ones, it also gave us another fraction of an inch clearance for the tie rod. An upgrade/swap to WJ knuckles is somewhat common on larger XJ builds, so there are a few basic “kits”/parts lists and others have documented the process fairly well. This is where the TJ parts started to come in, as we needed to replace our XJ hubs with TJ hubs. We also replaced the ball joints. In all, this enabled us to mount the tie rod and the drag link separately off of the knuckle.

Where to Mount the Track Bar?
Because we raised the drag link to the hi-steer location on the knuckle, we needed a raised track bar mount on the axle to enable the track bar to sit parallel with the drag link. We could therefore cut off the stock-location mounting piece on the new Artec buckets, which also helped with our clearance issue. We planned to use the SFR raised track bar mount, but it did not fit with our axle trusses. Wanting to keep the trusses, we looked for another option that did not attach as far on the top of the axle. Artec came to the rescue again with their TJ raised track bar bracket.

We used the SFR bracket for the driver side mount point, but we had to modify it to fit with our frame stiffeners by welding on an extension piece, elongating the mounting holes, and grinding off part of the exterior brace. The mods were worth it because the SFR bracket integrates a brace across the engine bay that helps stiffen the whole front end.

Where to Mount the Sway Bar?
Reconfiguring the sway bar was the most challenging aspect of this phase. Wonder Woman needs a sway bar to handle adequately on road. We considered running only a rear sway bar, but there aren’t very many options for the XJs and those could have caused their own interference issues. Thus, we had to make the front sway bar work.

The driver side stock sway bar mounting location was fine in all scenarios, but our steering and knuckle changes made it impossible to use the stock mount location on the passenger side because the mount hit the drag link when turning. We first attempted to use SFR's sway bar mount, but our gussets on the inner Cs made it hard to fit them in the correct place. We tried running the SFR mount on the passenger side and the stock-location mount on the driver side for a little while. This caused issues because the sway bar links had to be two different lengths, which caused uneven pressures and kept bending the SFR mount (even though it was 3/8 inch thick). We then tried shortening the stock sway bar itself to align it better over the SFR mount. That didn’t help for off-road, but it was OK for normal street driving.
1645491325870.png
1645491336819.png

We eventually found Clayton’s hi-steer sway bar mount, which attaches to the top of the inner Cs. They required some cutting to fit with our gussets, but they turned out to be the solution we needed. The only down-side is that we were forced to put them in a position where they rub against the springs in some scenarios, which causes undesirable squeaking noises, but it’s far better than constantly bending parts. Here is the final, happy set-up:
1645491366594.png


WJ/TJ Brakes
The WJs also had dual-piston brake calipers compared to the XJ’s single-piston ones, which have provided much-needed extra stopping power for our much-larger-than-stock tires and was another benefit of switching to the WJ knuckles. Given the required switch to TJ hubs with the conversion, we also switched to TJ rotors.
1645491501077.png

But, here was the catch with the WJ knuckles…the calipers did not fit inside our 15” wheels, so we had to run 1.5” spacers to push the wheels out to gain the clearance needed. We didn’t like the look, and we were worried about the extra stress the spacing would put on our Dana 30. So we ran the spacers for about 9 months until we could upgrade to 17” wheels (more on this later).
1645491420568.png


Rear Disc Brake Conversion
Since we went all-in on the WJ disc brakes, we also upgraded the rear from drum to disc brakes with a Teraflex kit. We were able to fit these discs inside our 15” wheels, but we ran the spacers anyway due to the front issues. With the WJ brakes on the front and these disc brakes on the back, we are able to fully lock up our current 35s and have a very good stopping distance on the street. The improvement on the trails was even more significant, giving us much better control over the vehicle on difficult, steep obstacles.

The conversion kit does not allow you to re-attach the ABS system, so we entirely removed it to avoid throwing codes and failing a safety inspection. We did this by pulling the full ABS unit, removing all of the related electrical relays, and replumbing all the brake lines with new stainless steel. We also switched to an aftermarket proportioning valve for the XJs that did not have ABS. We considered going to the WJ proportioning valve given the bigger brakes, but we haven’t seemed to need it.
1645491536238.png
 

Attachments

  • 1645491329299.png
    1645491329299.png
    566.6 KB · Views: 65
I love the write up and the thought process.
 
Back
Top