ThanksThe Jeep looked great!
You are using an out of date browser. It may not display this or other websites correctly.
You should upgrade or use an alternative browser.
You should upgrade or use an alternative browser.
What did you do to your Jeep today? - December 2022
- Thread starter Jeep Freak
- Start date
- Status
- Not open for further replies.

Finally installed my winch into the JT’s steel bumper. The fun part was fabricating a front license plate mount for it. Stopped by Home Depot and picked ups 1’ x 1‘ 22 gauge aluminum plate, bent it on a 2x4, cut it down to size, and added nutserts to hold the plate. I don’t think it came out too bad.
Attachments
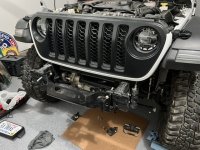


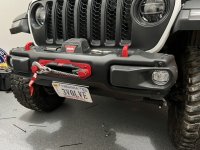
Did you dab some anti-seize on the license plate hardware going into the nutserts?Finally installed my winch into the JT’s steel bumper. The fun part was fabricating a front license plate mount for it. Stopped by Home Depot and picked ups 1’ x 1‘ 22 gauge aluminum plate, bent it on a 2x4, cut it down to size, and added nutserts to hold the plate. I don’t think it came out too bad.
A buddy drilled the new bumper for the license plate/hardware after we installed it on my wife's old JK. Of course he didn't put any anti-seize on the bolts and they rusted solid. The dealership had to cut the license plate off when she traded it in lol.
Will definitely go back and do that today.Did you dab some anti-seize on the license plate hardware going into the nutserts?
A buddy drilled the new bumper for the license plate/hardware after we installed it on my wife's old JK. Of course he didn't put any anti-seize on the bolts and they rusted solid. The dealership had to cut the license plate off when she traded it in lol.
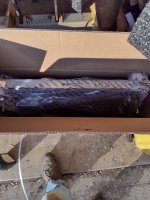
Anthony and I installed my RPM aluminum steering. Super beefy! According to RPM, I am one of the first Jeepers to receive the sleeves with the RPM logo etched into them. They’re pretty sweet!


Sent from my iPhone using Tapatalk


Sent from my iPhone using Tapatalk

That thing is beefyView attachment 5730View attachment 5731
New bumper installed with Anthony’s help! Loving the new look and hopefully will have a winch added soon
Yes it’s very heavy duty
People like you make me hesitant to ever host a wrenching party. Your garage is so clean! My garage is a pigsty. (And it is mostly my fault)View attachment 5730View attachment 5731
New bumper installed with Anthony’s help! Loving the new look and hopefully will have a winch added soon
Nice looking bumper!
At least you have a garage...People like you make me hesitant to ever host a wrenching party. Your garage is so clean! My garage is a pigsty. (And it is mostly my fault)
Nice looking bumper!
Chuck,Rob,
Were you experiencing overheating problems with R3? Curious on what prompted the upgrade. I have been running hotter than usual since the One Tons and 40’s and considering the new pump and radiator.
Chuck
The littel red brick is hefty at #6800. add 116,000 miles and yes cooling is a bit weak. Put a new pump on after a spirited run and the temp warning buzzer lit off. Mishimoto radiator is larger than the OEM which should provide more cooling. New Water pump was just insurance along with new hoses for the upcoming EOY run.
Jeep works harder pushing the big rolling stock and with the added weight of new axles there is more mass for the little 220 CID motor to push. She has gotten hot several times this prompted looking into the rad water pump change.
Now off to the unheated garage to swap radiators..... least it is 40+ degrees today....
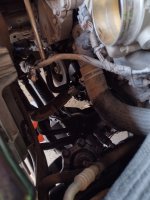
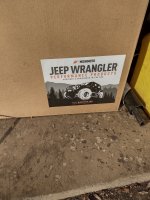
Mishimoto Radiator installed today. the You tubers say 5 hours..... yep check that off. Rad is held in with 2 bolts. But the fan shroud has to come off first. two bolts. Before removal can be done the AC condesor is screwed to the OEM radiator 4 bolts.... So we are up to 8 bolts yes?.... How hard can this be? The ac condensor is bolted in near the top and at the bottom of the unit. The top two bolts are difficult but managable. the bottom two are a mightmare. The driverside can be accessed with the winch bumper on. the passenger side..... Swivle joint with a shorty socket is too long... Wobble socket doesn't wobble enough... Pull both radiator bolts out.... use a prybar to lift the assemble to clear the lower mounting pins. Then you can get to the last little bugger with a ratching box wrench... Oh crap there is another bolt on the drive side holding AC lines in......not sure how to get that one back in.... getting it out was a 15 minute ordeal.
The new radiator has provision for all the bolts but for the condensor the bottom two do not align. Lots of filing in situ to make the connection. And ther is a bolt on the driveside holding the AC lines to the rad..... WIll have to tackle that one another day. Might need to take the driver corner apart to install the one 10mm bolt.....
Currently waiting on Uncle Bezos to drop off a set of red silicon rad hoses.... due in today sometime.... least the heavy lifting is done before the bottom drops out Friday afternoon. The Red Jeep shoudl be running tomorrow.... Just in time for the ice.

- Status
- Not open for further replies.
-
Officers
President: TheGuardianJLU (Hiam)
Vice-President: The_Rock (Lucas)
Member at Large: CranCherokee (Chris)
Secretary: Sticksout (Robyn)
Treasurer: TJ Girl (Danille)BOD
Gr8Dain (Dain W.)
HAWAIICJ (Dave P.)
Jeep Freak (Aaron T.)
jwilson2598 (Jeff W.)
- Quick navigation
- User menu